Kessil 0-10V Control Interface

Users Who Are Viewing This Thread (Total: 0, Members: 0, Guests: 0)

I’m just adding this in case it is useful for anyone. I am running two Kessil A80s on nano. I use 1 color schedule, and a schedule for each A80 for both the fixture outlet and its intensity. As someone posted, the light really doesn’t turn on until intensity is 11%. You can run separate schedules for power, intensity and color. But it really isn’t necessary. You would want the outlet to power on when intensity is above a level. So tying this to intensity makes sense. I assume most people that use this light will want to start/end on the deep blue (0% color) go up to some mix that they light (probably 40-60%) and back down.

I wanted to point out that an outputs level range is a factor of the schedule. For example, when the color schedule is set (as shown) to a max of 35%. You can have an output only use 80% of that max range. (0-100% is using the full schedule of 0-35%).

View attachment 2950
View attachment 2951

You can definitely get away with running multiple of these lights with just two of the 0-10v channels and daisy chain the lights. Until I need the channels, I’m just using all 4 0-10v to control them for some independent capabilities.
I am trying to set up a couple of a160 tuna blues for some reason I just can’t get this setup trough my head. Can you use one output jack on the quad cable to do all this to set up two schedules? How did you power your lights? Do you have the manual adjustment knobs set to max?
 
I am trying to set up a couple of a160 tuna blues for some reason I just can’t get this setup trough my head. Can you use one output jack on the quad cable to do all this to set up two schedules? How did you power your lights? Do you have the manual adjustment knobs set to max? I tried this and let me tell you my lights were no where near the intensity they should be way dark even set to 100% and control knobs set to max so not sure what’s wrong
 
I think you are misunderstanding what 0-10V is. It is a way to control the lights but will not power them. You must connect the lights to their power supply. Once you connect the 0-10V cables, the light will ignore the knobs.
 
This tutorial explains how to use your Control 4 0-10V output port to control any Kessil light that has a 3.5MM photo control input that accepts 0-10V control. Any Kessil lights that use K-Link ports for control, can not be controlled by Hydros using this method.

What you will need:
- Control 4 with free 0-10V output port
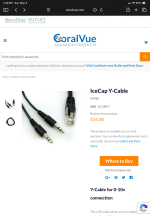
- Kessil Control Cable - Type 1 (PN: KSACB01) (Kessil Control Cable Type 1 for Neptune Systems Apex - 6 ft - Marine Depot)
- Hydros WaveEngine APX Link Cable (Hydros WaveEngine APX Link Third Party Controller Cable - CoralVue - Marine Depot)
- RJ45 non-active 1-to-1 coupler (Amazon.com: 10 Pack ethernet Coupler, ethernet Extender in Line rj45 Coupler Cat6/Cat6e/Cat5e/cat5 ethernet Female to Female Coupler ethernet Connector (Black+White) : Electronics)

Note: This method of using an RJ45 coupler works with Kessil since the interface on the light has only 1 ground pin. On the WE APX cable, only pins 3 (GND), 4(Port1/3), and 8 (Port2/4) are used. Pin 7 is not connected to ground like a typical Apex VDM port. So devices, like the Reefbrite APEX interface requires 2 grounds, so this interface method will not work.

Connection:

Connect the GX12 connector on the WaveEngine APX cable to the 0-10V OUTPUT port on your Control 4.
Then use either the RJ45 (ethernet) connector and plug it into a RJ45 coupler. The cable marked with a white tag is channels 1/2, black or no tag is channels 3/4.
Then connect the Kessil Control Cable into the other side of the coupler.
Then plug the 3.5mm phono plug into the 0-10V port on your Kessil light.
You can daisy chain multiple kessil lights by using their 3.5mm cables from INs to OUT, or buy a second Kessil Control Cable to connect to the unused RJ45 on the WE APX cable and run them direct on different schedules.

Once you have those connected then you need to configure the outputs. This configuration requires you to make 2 Outputs. One to control the intensity, and one to control the color.

Make a new Output and select the Variable Light profile. Color is controlled by Output 1 or 3 (based on which RJ45 used above). A percentage towards 0% sets the light to full blue, and 100% sets it to full white. Any value in the middle will set it to a mix of blue/white. You can use a schedule to ramp the color as the day progresses to start and end with blue and peak to white. Play with schedules and timing to see what works best for you.

Second you need to make another Output for the intensity. Again select the Variable Light profile. Intensity is controlled by Output 2 or 4 (based on which RJ45 used above). This follows the standard 0-100% intensity curve with anything under 10% turning the light off. Match the schedule of this output to your color channel to best use the spectrum/intensity.
Please help me out here. I have the parts orders and all the physical connections are made. Unfortunately, I can’t seem to make the twin schedules for color and intensity work. When I ramp up and down it goes from blue to white. Almost like the color and intensity got blended into one dial. Also, when I click onto feed mode, the lights shut off now. I didn’t change any settings to request that action. Help? Haha
 
The red wires on the female ends feed from the tip, which is also the feed from the Hydros Quad cable 0-10v cable ends. The black wire is ground, and the white is for the middle (the ring) which is unused in the Quad cable ends and therefore unused in this application. The male jack to 3 screw adapter is nicely labled as to which terminal is ground and which is tip and ring, or left channel and right channel if this was a stereo hook up. In this case, the red from one female goes to the tip and the red from the other one goes to the ring, with both grounds twisted together into the ground terminal. Keep track of which female conector goes to the tip and which the ring on the terminal adapter, and which Quad cable input goes to which. The input for the tip will be intensity, and ring controls color.

View attachment 1759

3.5mm 3 pole (TRS) stereo female jack to bare wire
3.5mm 3 pole (TRS) stereo male jack to 3 screw terminal adapter
Would a standard stereo y adapter work? Or is the wire connection here different than it would be for audio because it’s merging two to one versus splitting one to two?
 
Back
Top